Hivernation
Game downloadable from itch
This game was developed as a group over the course of ~3 months for a university submission, we used Unity with HDRP to create it. The idea for the game came out from the topic of city builder survival, from this the idea of this game happened. You build a colony of bees, assigning them to tasks to defend from oncoming waves of enemy wasps. As part of the submission a trailer and lets play were required, this component was handily done by a teammate and gives a brief look at what was created. Trailer:
Let’s Play:
For the game the main components I worked on and will detail are:
- Research
- Save system
- Building placement and building shapes
- Bee AI
- Camera
- Settings
- Sandbox mode
- Shaders
Research
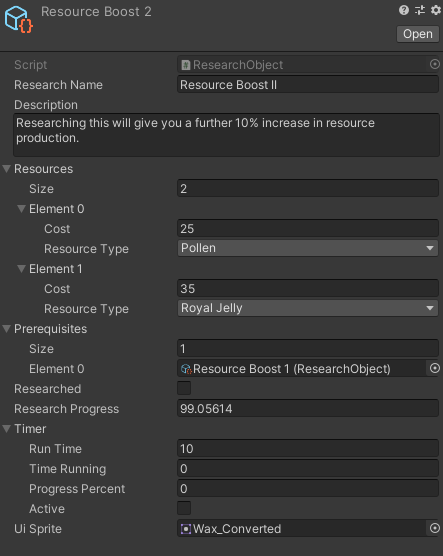
The game features a research system, this allows the player to select a topic to research, the research options can provide immediate benefits, or allow for buildings to be upgraded. The research system comprises of two main components, a ResearchManager which is a singleton MonoBehaviour, this is responsible for beginning a research task so that it may update the progress on the research topics that are currently underway, then when they are complete it can be removed from the active list to avoid ticking the progress on a research unnecessarily. The other main component is the ResearchObject, this is a ScriptableObject allowing for easy references in Unity’s editor. The research scriptable allows for easy checking of if the topic is complete, additionally the topic has an associated cost, and a list of other research prerequisites that are required to begin its research. This allows for easy setup of research topics as a new scriptable can be created and the fields filled in, additionally the topics have an event for when they have been researched allowing other code to listen to this event to be able to do some condition upon its completion, for example the resource system can listen to then increase the resource acquisition rate when a specific research has been completed. All this data is stored in a serializable format, meaning that when it comes to generating saves, the state of all research topics can be output to then be read back in on loading the save.
Save system
The save system uses Unity’s JSON serialization and [Serializable] attribute to be able to output the save data as a JSON file. A single static class acts as the main point of entry to create a save as well for loading a save. Data that needs requires saving have save wrappers, these are serializable classes that are fully public for the intent of ease of creation and ease of reading back in. An example save wrapper:
[Serializable]
public class SavedResource {
    public ResourceType Type;
    public int StartingAmount;
    public float TickDrainAmount;
    public float CurrentResourceAmount;
    public int Cap;

    /// <summary>
    /// Sets up values from a resource
    /// </summary>
    /// <param name="resource">Resource to save</param>
    public SavedResource(Resource resource) {
        Type = resource.resourceType;
        StartingAmount = resource.ResourceStartingAmount;
        TickDrainAmount = resource.ResourceTickAmount;
        CurrentResourceAmount = resource.CurrentResourceAmount;
        Cap = resource.ResourceCap;
    }
}
This save wrapper allows for the saving of a resource with as few parameters as possible, a resource itself stores more than this however these are the bits that change during play that are important. The resource type is a unique identifier as there is only one resource of each type, this allows the correct resources to get the correct values when loading back in, upon loading back in the save is read from and all values are set back up from bee positions to research tasks.
Building placement and building shapes
The game uses a hex grid to allow for placement of buildings, the hex grid generation code was handled by a team member. On top of theis system I added a component to all hexes to allow for them to be built on, this component keeps track of whether a hex can be built on, its neighbours and a way to access them based on their direction from this neighbour. With this there is then an enumerator for the different build shapes that are available, this then allows for a building to be placed on them by calling to a function which will check all of the required tiles based on the shape, if it can build it will return the position for the building to be placed at. This system allows for easy extensions as to support a new shape all that is required is to add it to the enum and the function to be updated to check that the associated tiles are available. Then the building data object requires its shape to be updated and its all ready to be used.
Bee AI
The bees in the game make use of a finite state machine, they have three states that are used, Idle, Move, and Build. The Idle state checks for certain conditions to then get a location for the bee to fly to, the bees have a home and work, if these are setup they are more probable to go to work or home, if not they will select a random building, set it to the target, and transition into the move state. The move state is responsible for following a path using Aron Granberg’s A* pathfinding project, here a bee will move towards its target checking if it is at its destination. Once the bee reaches its destination if it has reached either work or home, it will check if the building has a flightpath. If it does it will enter the build state, here it will use DOTween’s DOPath to follow a set path on the building flying around checkpoints as though pollinating flowers. Once the path end is reached the bee will exit back to the idle state to redo the process. Additionally if the building was not its work or home then the bee will also transition to the idle state to then determine its next action. Bee state machine, bee flightpaths
Camera
The game camera has two main parts, the camera itself, and a target to follow. The target is controlled with the W,A,S,D keys as well as being moved when the mouse is at the edge of the screen, and when holding the scroll wheel and moving the mouse. When the target moves the terrain it is on is sampled for the height to be able to get the correct positioning. Then the camera uses lerp to smoothly follow the targets new position. The main reason why a target is used rather than moving the camera directly is to allow for easy rotation. The camera rotates through the use of Q and E, then uses transform.RotateAround to rotate around the position. The camera additionally makes use of a zoom, allowing the player to get closer or further away to either be able to see the bees better, or to build on a better scale. The zoom uses some constraints and simply changes the cameras offset position from the target.
Settings
The game allows for the changing of settings such as the camera pan speed, camera rotate speed, whether the screen can be panned via locating the mouse at the edge of the screen, audio volume and so on. To do this in an easy way I wrote a wrapper to Unity’s PlayerPrefs system. Through it a setting can be declared with a default value and a type, all settings are stored in a static Settings class. Then when a setting is needed to be modified or read to use, they can simply be accessed through Settings.settingName.Value. This system was rather simple, clean and easy to use whilst needing little maintenance once setup except to add more settings to the static class as required. Here is the base setting class, this is then extended to create the required settings type and use within the static settings.
public abstract class Setting<T> {
    /// <summary>
    /// The id string for the setting to be saved as, no two settings should have the same ID string
    /// </summary>
    protected string settingId;

    /// <summary>
    /// The initial value of the setting before the player has potentially changed it
    /// </summary>
    protected T initialValue;

    /// <summary>
    /// The current value of the setting
    /// </summary>
    public T Value;

    protected Setting(string settingId, T initialValue) {
        this.settingId = settingId;
        this.initialValue = initialValue;
        InitValue();
    }

    /// <summary>
    /// A way to initialise the value to either its initial if the setting does not exist, or its value if it does
    /// </summary>
    public abstract void InitValue();

    /// <summary>
    /// Updates the value of the setting, and its saved value
    /// </summary>
    /// <param name="newValue">The new value for the setting</param>
    public abstract void SetValue(T newValue);
}
Sandbox mode
Late in development we changed from having a “level editor” that allows players to place buildings to create base levels to then load and play to a sandbox mode. The change involved adding infinite resources so that players can place buildings as they wish as well as adding some custom settings. The addition of settings really should have been made earlier as it made debugging much easier as the right conditions could be forced to then test what is required. The options that I added were to toggle the fog of war on or off, the ability to change the current season jumping through time, and to change the length of the seasons. These additions were all relatively simple and singleton managers required some small modifications to get them to be changeable.
Shaders
We used Unity with HDRP to create the game, as such we could make use of ShaderGraph to create custom shaders to have some nice effects. For this project I have been relatively new to using this system however have managed to now understand it somewhat to create helpful effects. The main shader that I had produced is the building shader. For this I created a sub shader graph to sample the base maps typically used as unity does not seem to have a simple way to sample many, so this samples the base map, metallic, emission, mask, roughness etc. to give the base values typically needed. This shader then additionally supports a bool so the building can be turned red or green based on if the placement of the building on the grid is valid, additionally it then can use a sub shader made by a teammate that dissolves the building making use of the alpha clip. This can be controlled through the shader so that when they are destroyed then the building is dissolved. Then the emission map allows for a colour multiplier, this was to allow the research building to shine up when a research is currently underway.
There is additionally a shader for hexes that makes use of emission to give them a nice glow, a base colour is used in combination with a map that is used for the emission to cause the hex to glow. This then exposes a intensity so that they can be set to be more or less visible based on the distance from the cursor when buildings are being placed. Late into the project we discovered that HDRP supports a decal projector, this was used for the clouds and ground decal. The clouds were tricky to get working and feeling right as they use noise scaled with time to get a moving colour, another noise is sampled with a different speed to then get the clouds to break apart and reform. With this the colour mask node is used to get a smoothish colour, this does not seem to be the intention of this node however it worked for what we required. This is then output to the alpha and a grey base colour is sued giving a nice cloud effect. For the ground shader a base mask is used in a hexagonal shape with a blur, this is then used as a mask for the base map and normal map to just affect the ground under the building in a hex shape.
Thanks for reading
There are more components that I worked on than covered above so if you have other questions about other workings of the game feel free to contact me.